Showing posts with label progress. Show all posts

Sunday, August 5, 2012

Nearly There

We're down to the last week of Summer semester, meaining it's time for a quick image heavy post about what has been done and what I still need to do. Observe then, eight pairs of tubing earrings with a total of 96 stones set in them finished.


 After that mess I moved on to the matching chain. the top picture is the holes being drilled for the chain links which shows off the tip I learned to clean up drill holes. You take a fairly large drill bit (at least three or four sizes bigger than the hole) and twirl it by hand a few times in the hole. It makes a nice beveled edge and knocks off the burs as evidenced on the left.


Bonus: my chain has this cute handmade clasp. Hopefully, it will stay working for quite a long time. I have actually finished this necklace and set some 40 stones in the ends of the tubes, but of that will have to wait a bit.

I finished six pairs of triangle earrings to add to the random production stuff. Just, you know, putting that out there too. I still have to lacquer some of the record/laserdisc/brass earrings and I decided to to give some of the "backwards" earrings a shot, making some in acyrlic and some in sea glass. Glass drilling experiments ahoy!


For rubber mold making I got the molds to work well enough to cast them. Here are the waxes from those molds with the stones sitting in them for fun. I still like the rutliated quartz in the ring.

In the center of this image is the incomplete casting from the first attempt at it and the waxes for the second attempt which failed even MORE via a blowout.

Thus this is the third attempt at casting the rubber molded jewelry, before I attached the squiggly pendant wax to the top.

It worked! The third time it worked! I had to ask another student about production sprueing and have them check it over, but it worked! Hooray, I can have fun with the long road to clean up, as well as setting the stones into these. Ideally I'd like to finish all this over the weekend, but I have to come into the studio Monday and Tuesday at least to conquer a production side project.

So much to do and so little time as always, if I stay motivated I will finish before next Friday (that's six days!) and have two weeks off to pack up for college full time. Plus I keep coming up with other projects and designs I want to start on instead. Well, at least next week there will be some prettier pictures as we look back on an incredibly hot Summer's worth of work!

Tuesday, July 17, 2012

Gaudy, Gaudy, Gaudy

Do I watch Antiques Roadshow? Yes. Am I man enough to admit to it on the internet? No. Anyways here is a big old Tiffany sterling silver and enamel vase made for the 1893 Colombian Exposition worth about $50,000-$100,000. On the show they kept referencing how ugly it was, though the more I looke at it the more I admire parts of its garish decoration, like the three handle loops and especially the enameled curves in the middle. Part of that is probably due to me not actually owning the vase, or having seen it in person.

Here's a George Nakashima shelf, who was a woodworker and had a different piece some one brought in on the same Antiques Roadshow episode. He has an interesting aesthetic, retaining as much of the natural shape of the wood he uses as possible, as well as sometimes using obvious butterfly joins in his pieces. There an old article in LIFE magazine here where he talks about his work, and a website here. Yes I am more interested in the obvious connection points than in the natural edges, since a natural piece of metal would look largely like a dirty rock.

Despite the heat I managed to get a couple of pieces "done" before giving up on it. Here are the matching earrings to go with this wax pendant from last week. The earring on the right has already been sprued for the eventual rubber mold, I still need to do the same to the pendant, but it's also too hot for wax work.

These are the offical earrings for the rubber mold making class, complete with ugly old sprues coming out the bottom. The ring still needs more work, but I'm thiiiiis close to finishing all of my postives for the molds. the next trick will be to scrounge up enough silver for all of these, though they are fairly light weight, excepting the pendant. Hopefully soon I can get into what must be a blistering studio and actually make this stuff, ideally after it has rained some and cooled down.

So until then its back to the drawing board for production and waiting out the heat.

Wednesday, June 6, 2012

Error! Recalculating... Error! Recalculating...

A lot changes in a week, for example my fancy Jupiter pendant from last week has turned into this:

Which then abuptly turned into this, ready for casting:

and it will be casted in brass this Thursday! I was also going to set these turquoise stones (plus a CZ in the little end loop) in it much like the lower right sketch, but I dropped one and broke it.

Oh well, it wasn't a particuarly great stone to begin with as I now realize. It's off to riogrande.com for a new, kind of expensive one.

Now because I wound up doing last minute cleanup and investing for casting my Jupiter pendant for mold making, I haven't gotten as far as I had hoped on my hydraulic experments for the production side of things.

First I tested what little I was able to round up and send through a rolling mill to "print" the texture on the metal. Above is what was left of the strings I used and wound up with shallow rope like lines on the sheet metal. I also tried some cheap old lace stuff which survived the mill, but also gave me a shallow kind of stippled pattern. Oddly the novelty paperclips worked perfectly well, observe:

And despite being probably made of steel neither the paperclips, copper, or rolling mill was ruined (well further ruined in the case of our old rolling mill, no wonder its being replaced).

In terms of what to actually do with said hydraulic forms and textures has been all thrown out the window at this point due to a debate between high end and low end jewelry. I had a inital idea to combine paper origami with metal in earrings etc. in order to have something within the twenty dollar or lower range for the student sale. Most of this short sightedness is due to the shawl pins from the last sale being too esoteric and too overpriced an item to sell and needing money to finance long term tools.

But since the mixed media with paper thing is border line junk that could be cranked out at a later date, I've re-thought a little for the long term and am thinking earring jackets are the way to go.


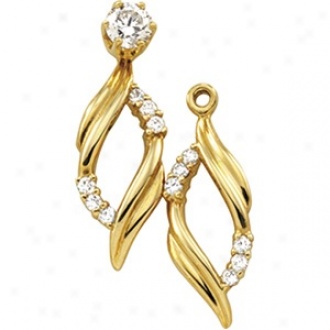
They're out there but not too out there, if you know what I mean. This way I can offer a cheaper alternative to the gold and white gold examples above and still have the mix and match modularity with the customer's own earrings I orginally was thinking about last week. This way the rubber mold making stuff can be higher end, and the bottom end can be the d-pad pins, a trefoil flower pin with a shape that accidentally looks like the Mitsubishi logo, and the hydraulic triangle earrings with roll printed designs I made for myself. Also stone settings and studs with white cz's would be relatively easy to make in order to pair with them.

Naturally now that I have some semblance of a plan I feel like I wasted a bunch of time on mostly unusuable hydraulic dies and other materials, but at least gained the advice that I should approach making jewelry to sell the same way I approach getting an art style which is to not force it and just let it develop on its own, meaning that I shouldn't try to predict what will sell to a market while trying to tailor to it and just make some cool designs I like.

Sunday, May 8, 2011

Cram Crammity Cram Cram

The semester's winding down so its one final push to get all the pieces done for Monday's critique at the unholiest of exam times, 7:40 in the morning. Here's some pictures of the current state of things:


The kalimba looked like this when I went to go work in the studio at 3:00 and after some funky soldering setups later...

I had these at 9:00 when I decided I couldn't take it anymore and left:

Now Veronica, you may be asking, what's with this boring picture of mostly wire? there's nothing going on in it! To which I say oh ho! you are wrong for there is a metric ton of stuff going in in this picture! Let me articulate you for my master plan! Tomorrow I will:
  • Get up at 8:00 (optimistically).
  • Actually get up at 9:00, maybe.
  • Get breakfast and got to the store for hydrogen peroxide.
  • go to the studio and begin stringing the asteroids on to the necklace, bending the now hardened wires, cleaning, and correcting drill holes as I go.
  • soldering the end cap asteroids on to the wires, then preparing a solution of hydrogen peroxide and pickle to take off the copper plating our regular pickle always leaves behind. (Remember no steel in the pickle, kids!)
  • Then I will keep hammering my piece of steel music wire flat and eventually cut it to make keys for the kalimba.
  • The kalimba itself needs a lot of clean up still to make it nice, shiny, and excess solder free.
  • Attach the keys and adjust them so they are sort of in tune.
  • Go home.
So there's a lot to get done tomorrow not to mention yet another final paper to worry about, so I shall now leave you with this thought: kalimbas are also called finger pianos and I've unintentionally made mine in the shape of a grand piano. Irony.

Thursday, April 14, 2011

Would Anyone Like a Mint?

First off, good news! My tiara will be on display with others Saturday in the V.I.P. lounge at Runway 4.0, the Fashion Departments big student show! Yaaaay!

Next up some good old progress updates:

The re-do of the ring in Rhino printed fine except for the three tori on the the top/front but thats my fault for not re-orienting the ring on the computer into a more easily printable postition. The Pacman brooch also printed fairly well and is in the display cabinet outside of the studio.

And, I finally got the asteroids decently cleaned up to where they look like the one on the right. that was achived thanks to our now functioning sand blaster in the studio closet! Now all I have to do is grind off whats left of the sprues, solder them together, and send them through the tumbler for that extra polish.

I also made this mock up of a thumb piano/ kalimba just to see how bad it would sound. By constructing this one and looking at one that the professor's son has I've learned quite a lot about about what needs to be done on the final piece, such as
  • The keys have to be made of steel about three times wider than the bobby pins and arranged from smallest to largest in order to play the instrument with one hand.
  • The bottom "bridge" should have a taller profile than the top "bridge" and be made from a brass rod.
  • The rod holding down the keys should be made of steel. If not, it should be nailed down in more places than the ends or else the middle keys become loose.
  • Loose keys make a godawful buzzing noise.
  • there should be a great variation in length from one key to the next to create distinct notes.
Here's a bonus video of me playing around with my little Altoid kalimba, you can hear how loose the center key is and that most of the other ones are way, way too short. But it goes plink plink! A final thought on the project is that hyrdaulic die forming was tossed around as a quick way to make a hollow sound box, so I went looking through the drawer of old dies and found this one.

It's just wider than my admittedly small wrist and its the perfect shape I've been trying to think of for the sound box, hopefully I can use it or something similar. For now it's time to sleep on it, because tomorrow is the set up for the Runway 4.0 show!

Friday, April 8, 2011

Riveting my Brains Out

Don't worry I got them back in later. So why rivets? Well, you see, like many long, strange trips to brain loss I began making the tiara project in my basement during the last two days of break.

While doing that I revised my original plan a little bit in order to incorporate more spoons into the tiara, this is the only sketch I made showing what the right side of the tiara would look like.

And here it is riveted together. I decided to cold connect the entire piece because I used silver plated spoons and heat will ruin the finish.

Because I scrapped much of my original design there was lots of trial and error with masking tape. The dangly rhinestones over the nose (theres a rhinoplasty joke in there somewhere) never made it into the final piece, among other ideas too ridiculous to photograph.

This is the basic form of the tiara all riveted together, what remained was to decorate it with found objects which some of the holes for riveting those were done on the drill press at home.


The top image is the first trial layout of items and the bottom is the later, mostly final arrangement of objects on the tiara. By this time it was Monday and I was back at school.

Here it is half riveted at about 11 o'clock on Wednesday night, after obtaining more drill bits, when I decided it would be a better idea to go to bed and finish it on Thursday.


And here its is finished! Enjoy the four picture turn around of it. There are 30 rivets holding it together including the found objects. Besides the spoons (of which there are 6.5) going from the left there is a gold domed clip earring wire wrapped on, a pink and white plastic leaf necklace part, silver crescent shaped pierced earring, 1940 Canadian penny with copper disc underneath, two buick key knock outs, a Chrysocolla cabochon in a copper star, an gold clip earring back, a re-created necklace hang tag (I broke the original trying to get it attached), three brillant cut CZs and blue plastic gems in a nickel-silver volcano setting, a wire wrapped brown plastic clip earring, and a bee clip earring. All of this makes it a heavy piece with a lot of weight towards the front, you can't look down with it on or else it starts slipping down your forehead. Form over function I suppose...


I'm so proud of this work I actually decided to be pretentious and dug out my stamping set and put my initals plus the date on it. The bonus picture on the right is most of the rivets visible on the inside of the forehead band. They've been crushed pretty smooth so they don't catch too much on one's hair. Speaking of which...


Here it is being worn and me doing my best "concentrating on pressing the shutter" face. I'm going to be submitting this piece for the fashion show that the fashion tech department does each year, this year jewelry is doing a bit of a collaboration with them, and I hope my piece gets accepted! Now, some of you may be wondering what happened to the asteroid necklace and well.......

It got casted, the smaller one is 1.6 ounces and the large tree is 12.6 ounces of brass. Coincidentally, we found out the electromelt can maybe hold 14 ounces of metal. It looks like I'll be working on this again Friday morning when I hand in my tiara untill the next project is assigned.